
Malfunctioning fuel injectors will reduce fuel efficiency and may cause engine misfires. Make sure that the injectors are receiving enough voltage to operate correctly.
If your car’s engine runs rough, it may be due to the fuel delivery system. A malfunctioning injector can disrupt the ignition process in the cylinder.
This leads to an imbalance in engine operation in all modes. Fuel efficiency drops because the fuel may not burn completely and you have to press harder on the gas to get the car moving.
Fuel injectors are a special type of solenoid that can quickly activate their pistons. This allows the injector to inject a precise amount of fuel into the cylinder even when the engine is running at high speeds. During the life of a car, injectors fire millions of times.
Over time, they wear out and can accumulate deposits that reduce engine performance. This manual describes how to check that the injectors are receiving the correct voltage and the injector resistance value.
Injectors can be faulty even if the incoming voltage is correct. They can accumulate deposits that disrupt the process of fuel injection into the cylinder. This, causes incomplete combustion of fuel and interruptions in engine operation.
How to check the injector resistance
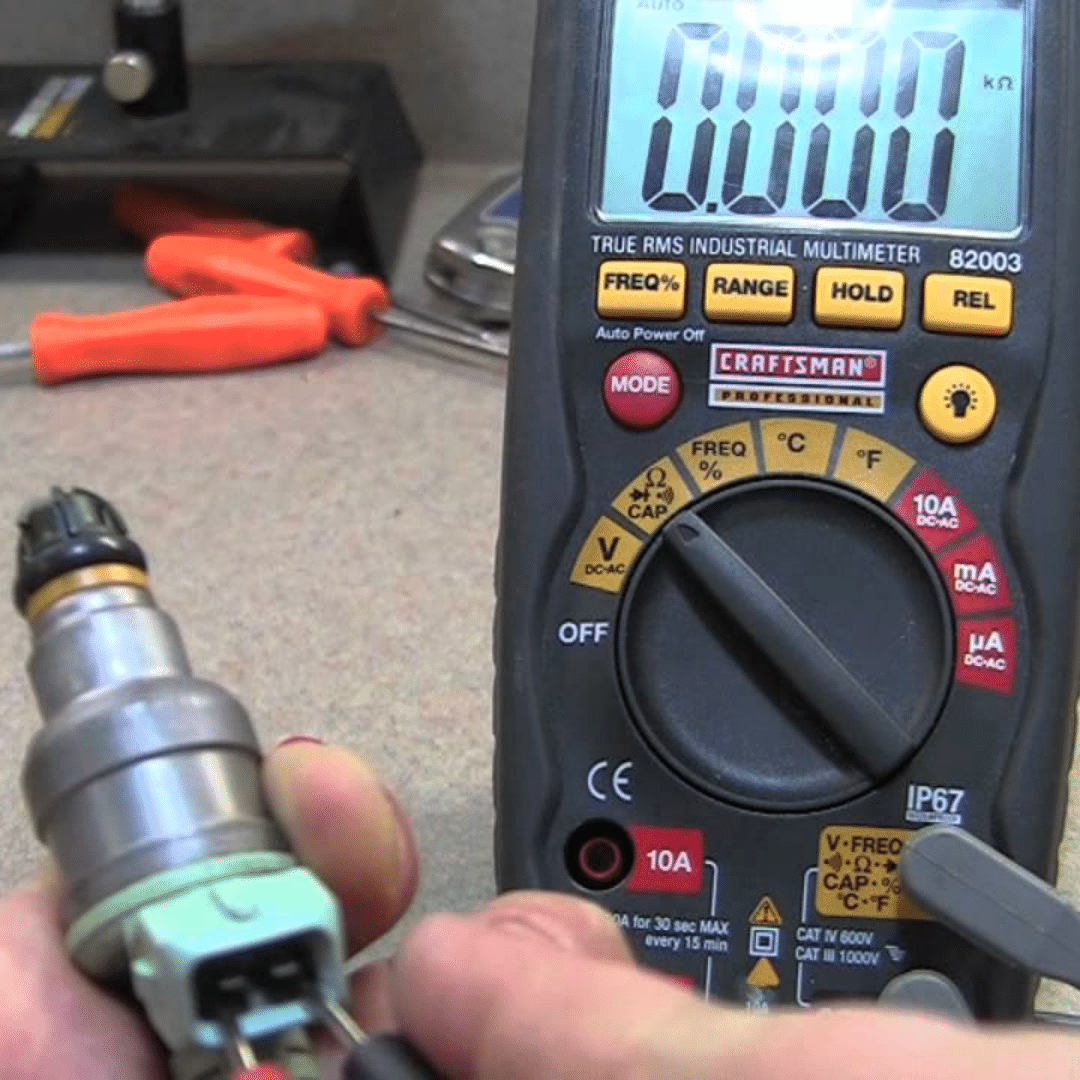
- Materials needed: Digital voltmeter or multimeter with resistance measurement capability.
- Attention: On some engines, access to the injectors requires removing the decorative plastic engine cover. It is usually secured with standard bolts, which can be easily unscrewed using the appropriate socket and extension.
Step 1: Make sure the ignition is turned off. No voltage is required to perform this test.
Step 2: Disconnect the injector power harness. There may be a latch on the cable connection that you need to slide and then press on the tabs to release the connector.
Step 3: Set up the meter to measure resistance. If it does not have auto-tuning, set the measuring range to the minimum.
Step 4: Check resistance. Connect the meter contacts to the teeth of the electrical connector, avoiding shorting them.
- High-resistance injectors are currently the most common. Their resistance can be in the range of 12-17 Ohms.
- Low-resistance injectors can be installed on high-performance and powerful engines. Their resistance is much lower – usually, it reaches 2-5 Ohms.
Step 5: Repeat the test on all injectors. The deviation of the resistance values of all injectors should not be more than 0.5 Ohm.
If the deviation is larger, it is necessary to check the injector for correct fuel atomization.
Tip: The standard resistance value for your car’s injectors can be found on the Internet or in the car repair manual.
How to check the electrical connection of the injectors
Step 1: Turn on the ignition. Turn the key to the second position (ON). Power will begin to flow to the engine elements. Do not start the engine.
Step 2: Set up the meter to measure DC current. If it does not have auto-tuning, set the measuring range to the minimum.
Step 3: Connect the negative terminal of the device to ground. The car body is grounded, so you can find any unpainted body parts under the hood.
Tip: Some meters have alligator clips on the terminals so you don’t have to hold the wire. This will free your hands and you will be able to correctly connect the positive contact of the device.
Step 4: Connect the positive terminal of the device to the injector wiring harness terminal. The harness has two terminals into which the injector connector teeth are inserted. One of them is grounded and should read 0 V. The second should read about 12 V.
Step 5: Repeat the operation for all injectors. Without touching the ground, repeat the procedure for all injectors.
All readings should be around 12 V. Lower readings indicate resistance in the cable.
These tests may help you find faulty fuel injectors, but as noted, the problem may not be electrical. If the resistance values are correct, the next step is to remove the injectors and check the spray pattern using an injector tester.